
Fix Blurry Photos with AI (Step-by-Step)
Trying to fix blurry photos with AI can feel like a gamble. Sometimes tools over-sharpen and create halos. Sometimes they “invent” details that look fake. The good news is: blur is not one single problem. When you identify the type of blur and use the right workflow, AI can improve clarity dramatically—especially for portraits and product images.
This step-by-step guide is written for beginners and busy creators who need practical results fast.
Step 0: identify the type of blur (fast)
Before you fix blur, look for the cause:
- Motion blur: subject moved during capture (streaks)
- Out-of-focus blur: camera focused on the wrong plane (soft everywhere)
- Low-resolution blur: image is too small, then enlarged (pixel mush)
- Compression blur: heavy JPEG artifacts smooth detail (blocky/dirty)
Featured snippet: fastest way to decide
- If the image is tiny → start with upscaling
- If faces look soft → use face enhancement
- If the subject is clear but background is messy → remove background for a cleaner final look
Step-by-step: fix blurry photos with AI
1) Start from the best available file
This is the most underrated step. If you have:
- an original camera export
- a higher-quality version from a client
- a RAW or “original” social download
Use that. If you start from a compressed screenshot, the ceiling is lower.
2) Upscale when the image is low-resolution
If the photo is small (or looks “mushy”), you need more pixels. This is where AI helps most.
Use a dedicated upscaler first. Try our image upscaler to increase resolution and recover edges before you attempt any other changes.
3) Improve faces (portraits need special handling)
Faces are where humans notice everything. If you only sharpen globally, you can get crunchy skin.
For headshots and creator photos, use our face enhancer after upscaling. It’s designed to improve facial clarity while keeping skin texture more natural than basic filters.
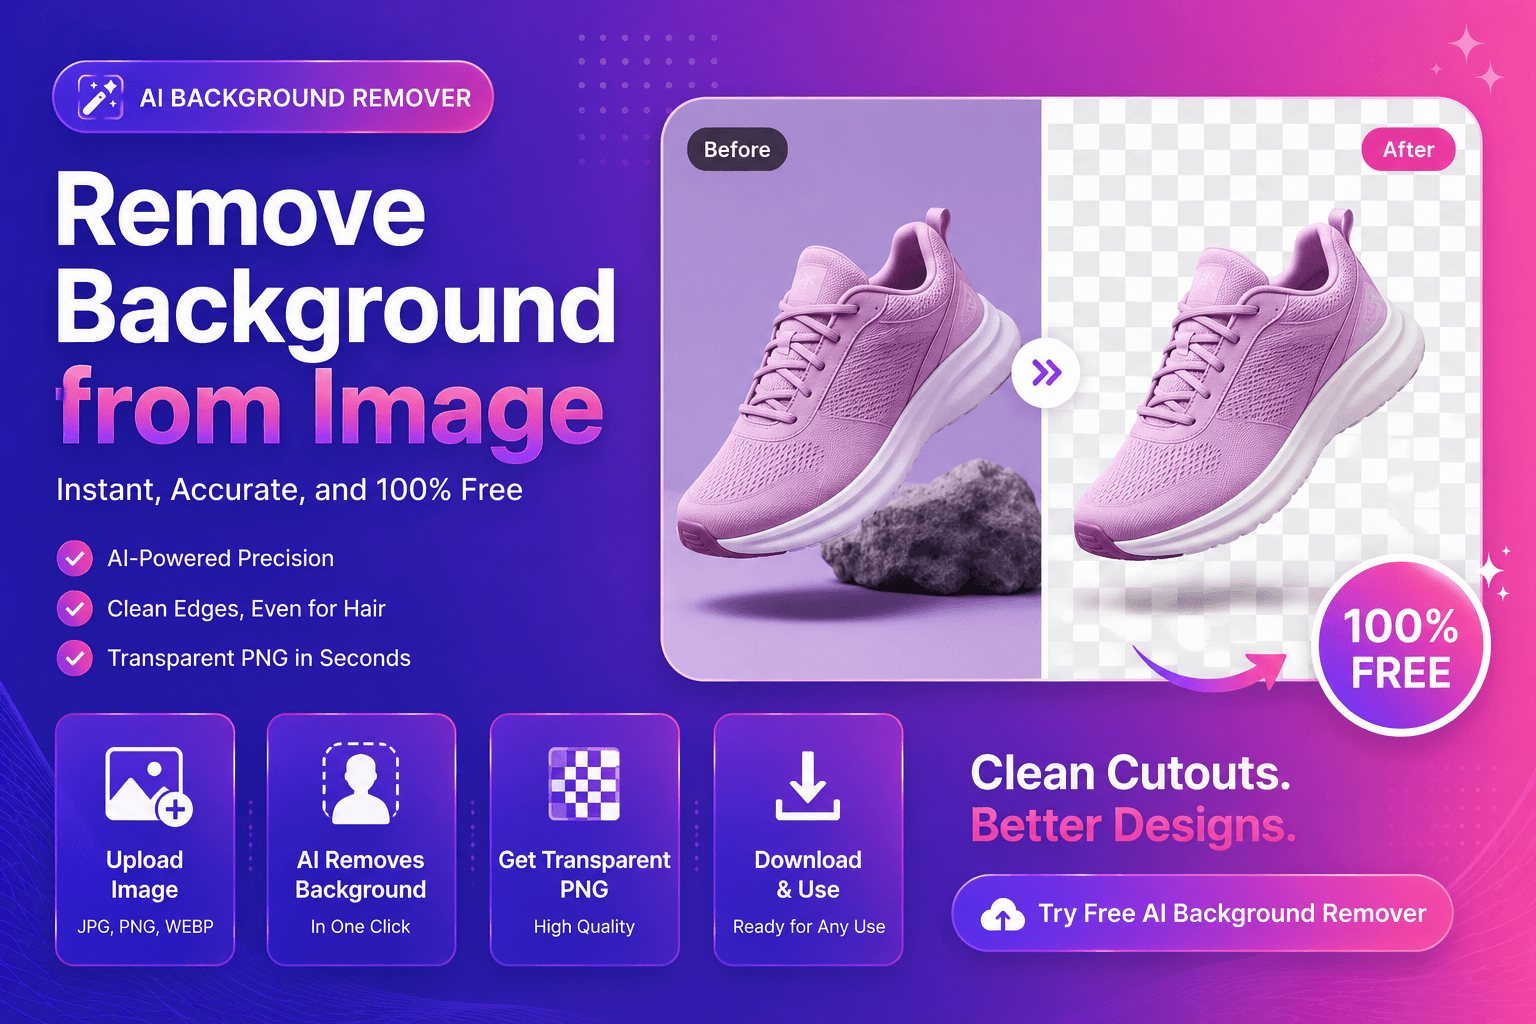
4) Clean the background (a simple trick for “sharper” visuals)
Here’s a real design secret: people perceive images as sharper when the subject is clean and separated.
Even if your blur improvement is limited, removing background can make the final design look more professional. Try our free AI background remover and place the subject on a simple background to reduce visual noise.
Common blur scenarios and what to do
Scenario A: blurry product photo for e-commerce
Goal: sharp edges, clear label text, clean presentation.
Workflow
- Upscale to recover edges and label clarity
- Remove background for a consistent catalog look
- Export with a standard size and background
Tips
- Avoid extreme edits; keep packaging realistic
- Use a neutral background for marketplaces
Scenario B: blurry portrait / selfie
Goal: natural face clarity without “beauty filter” look.
Workflow
- Upscale if the image is small
- Enhance face detail with a dedicated face step
- If needed, remove background for a clean profile asset
Scenario C: old photo / scanned memory
Goal: improve readability and perceived detail.
Workflow
- Upscale to increase pixel dimensions
- Apply careful enhancement (avoid over-sharpening)
- Export to a format suitable for sharing and printing
For format decisions, MDN’s guide is a great reference:
MDN: Image file types
Tips to avoid AI artifacts (keep it realistic)
When you fix blurry photos with AI, avoid these mistakes:
- Over-sharpening: creates halos around edges
- Stacking many filters: builds fake texture
- Judging by tiny previews: always zoom to 100%
H3: a simple “reality check” method
After processing:
- compare original vs enhanced at the same zoom
- check eyes, teeth, hairline, and product text
- if it looks “too perfect,” dial back and choose a more natural result
External references (authority)
These help you understand why blur and compression happen:
FAQs
Can AI really fix blurry photos?
AI can improve clarity, especially for low-resolution images and portraits. Motion blur and heavy compression are harder, but results can still improve.
What blur is hardest to fix?
Strong motion blur is often the most difficult because real edge information is missing.
Should I upscale before enhancing?
If the image is small, yes. Upscaling first gives the enhancer more pixels to work with.
Why do some AI tools make faces look fake?
Over-smoothing and over-sharpening remove natural texture. Use a face-focused enhancer designed for realistic results.
How do I make a blurry photo look professional for social media?
Upscale, enhance faces if needed, then remove background or simplify the design so the subject stands out.
CTA: Try ImgifyTools now
Ready to improve your image?
- Fix clarity by running our image upscaler
- Enhance portraits with our face enhancer
- Make designs cleaner with our free AI background remover
Upload your image now and compare the result instantly.
Conclusion
To fix blurry photos with AI, don’t treat every blur the same. Identify the blur type, upscale when resolution is the problem, enhance faces carefully, and simplify backgrounds to make the final output look sharper. With a practical workflow, you can turn “almost usable” photos into assets you’re confident to publish.
You may also like

Enhance Face Quality in Photos Using AI
Enhance face quality in photos using AI with a simple workflow. Improve clarity, reduce blur, and keep skin texture natural—perfect for creators and profiles.
Read next →
Remove Background from Image (Free AI Tool)
Remove background from an image in seconds. A simple AI guide for clean cutouts, transparent PNGs, and pro results—free with ImgifyTools.
Read next →