How to Remove Background from Image (Free AI Tool)
Need to remove background from image fast, without Photoshop, plugins, or manual masking? You’re not alone. Product sellers, freelancers, and creators often have one problem: the photo is good, but the background is messy—so the final design looks unprofessional.
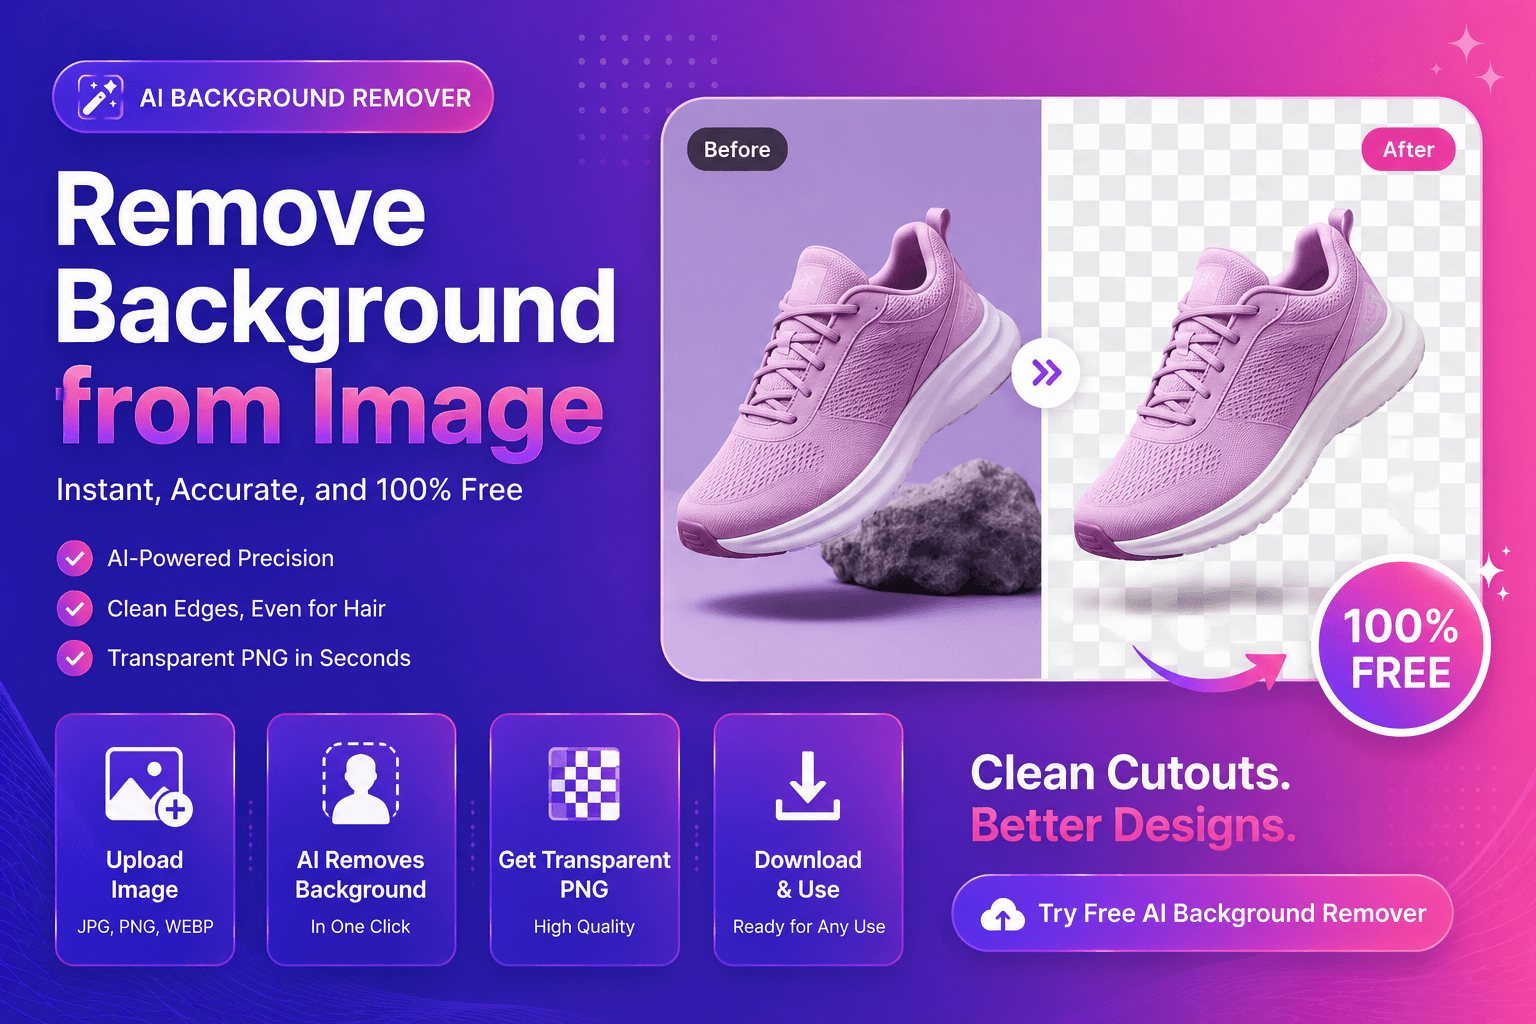
In this tutorial, you’ll learn a simple, reliable workflow to remove backgrounds online, get clean edges (even around hair), and export a transparent PNG you can use anywhere.
When background removal makes the biggest difference
Background removal is not just a “nice to have.” It improves conversion and clarity when you’re working on:
- E-commerce product images for marketplaces and stores
- Profile photos and creator headshots
- Ad creatives where the subject must pop
- Thumbnails for YouTube and social content
- Design assets for posters, flyers, and landing pages
If you want the fastest path, try our free AI background remover and upload a single image to see instant results.
Step-by-step: remove background from an image online
1) Choose the best source image
Your results depend heavily on the original file. Before you upload, check these basics:
- Use the highest resolution you have (avoid tiny screenshots).
- Avoid strong compression artifacts (blocky JPGs create jagged edges).
- If possible, pick a photo with good contrast between subject and background.
2) Upload to an AI background remover
Upload your image and let AI separate the subject from the background. This is the moment most people rush through—don’t.
After processing, zoom in and inspect the cutout. You’re looking for edge quality.
3) Inspect edges like a pro (the “3-zone check”)
To remove background from image cleanly, check these three zones:
Hair and fur (soft edges)
Good cutouts keep natural softness. If you see harsh “helmet hair,” it’s usually because the original image is low quality or the subject blends into the background.
Product borders (hard edges)
Shoes, bottles, electronics, and packaging should remain crisp. A good background remover preserves straight lines and sharp corners.
Semi-transparent areas (glass, smoke, mesh)
These are difficult because they require real transparency, not a strict “on/off” mask. Keep expectations realistic, and use better source images when possible.
4) Export the right format
For most use cases:
- Export PNG for transparency (best for design and product cutouts)
- Export JPG only if you want a solid background baked in
If you also need higher resolution (for banners or zoomed-in crops), run the result through our image upscaler after background removal to keep things sharp.
How to get cleaner results (common mistakes and fixes)
Mistake: uploading a tiny image
Small images don’t contain enough detail for clean edges. Fix: find the original file or upscale first.
Mistake: choosing images with similar colors
A white shirt on a white wall is hard. Fix: use images with stronger separation, or reshoot with simple lighting.
Mistake: expecting perfect results on motion blur
Blurred edges are ambiguous. Fix: pick a clearer photo, or accept a slightly softer cutout.
Best backgrounds to use after removal
Once your background is removed, the next step is choosing what replaces it. These options work well for most beginners:
- Pure white for marketplaces (clean and consistent)
- Soft gradients for modern SaaS/branding assets
- Solid brand colors for social templates
- Blurred version of the original (quick “studio look”)
If your image will be used on the web, it helps to understand how formats impact performance and appearance. MDN’s guide to image types is a practical reference:
MDN: Image file types and formats
Featured snippet: quick checklist (copy/paste)
Here’s a quick checklist you can follow every time:
- Upload the highest-quality image you have
- Run AI background removal
- Zoom in and check hair, product edges, and transparency zones
- Export a transparent PNG
- Upscale if needed for large designs
- Enhance faces if it’s a portrait
To speed up your workflow, use our free AI background remover now and export a transparent PNG in minutes.
Pro workflow for e-commerce sellers
If you’re uploading product images regularly, consistency matters. Here’s a simple repeatable system:
H3: Standardize your product photos
- Keep lighting similar
- Use the same camera distance and angle
- Avoid busy backgrounds
H3: Batch your editing steps
- Remove background for all products
- Replace background with your standard style
- Compress and resize for your marketplace
If any product photo looks soft, try our image upscaler before publishing. And if you include people (models, team photos), use the face enhancer for a clean, professional look that still feels natural.
FAQs
Is it really possible to remove background from an image for free?
Yes. Many tools allow background removal without paying upfront. With ImgifyTools, you can start quickly and export cutouts for common workflows.
Which file type is best for background removal?
Upload PNG/JPG/WebP. Export PNG if you need transparency.
How do I remove background from image on mobile?
Use a mobile browser and upload your photo. For best speed, avoid huge files on slow networks.
Why do edges look rough around hair?
Usually due to low resolution, motion blur, or similar background colors. Try a sharper image, or tweak your source photo.
Can I upscale after background removal?
Yes—and it’s often the best order. Remove background, then upscale if you need more pixels.
External resources (trusted)
If you want to go deeper:
- Google Search Central: Image SEO basics
- MDN: Image formats and when to use them
- web.dev: Image performance issues
CTA: Try ImgifyTools now
Ready to remove your first background?
- Try our free AI background remover now and export a transparent PNG.
- Need more clarity? Upscale your image with our AI upscaler.
- Editing a portrait? Enhance faces with our AI face enhancer.
Conclusion
If you want to remove background from image quickly and get professional-looking results, focus on two things: a good source photo and a consistent workflow. With the right upload, a fast AI cutout, and a clean export, your visuals instantly look more premium—and that translates into better clicks, better trust, and better sales.
You may also like

Enhance Face Quality in Photos Using AI
Enhance face quality in photos using AI with a simple workflow. Improve clarity, reduce blur, and keep skin texture natural—perfect for creators and profiles.
Read next →

Fix Blurry Photos with AI (Step-by-Step)
Fix blurry photos with AI using a simple workflow. Learn what blur types exist, how to improve clarity, and when upscaling and face enhancement help most.
Read next →