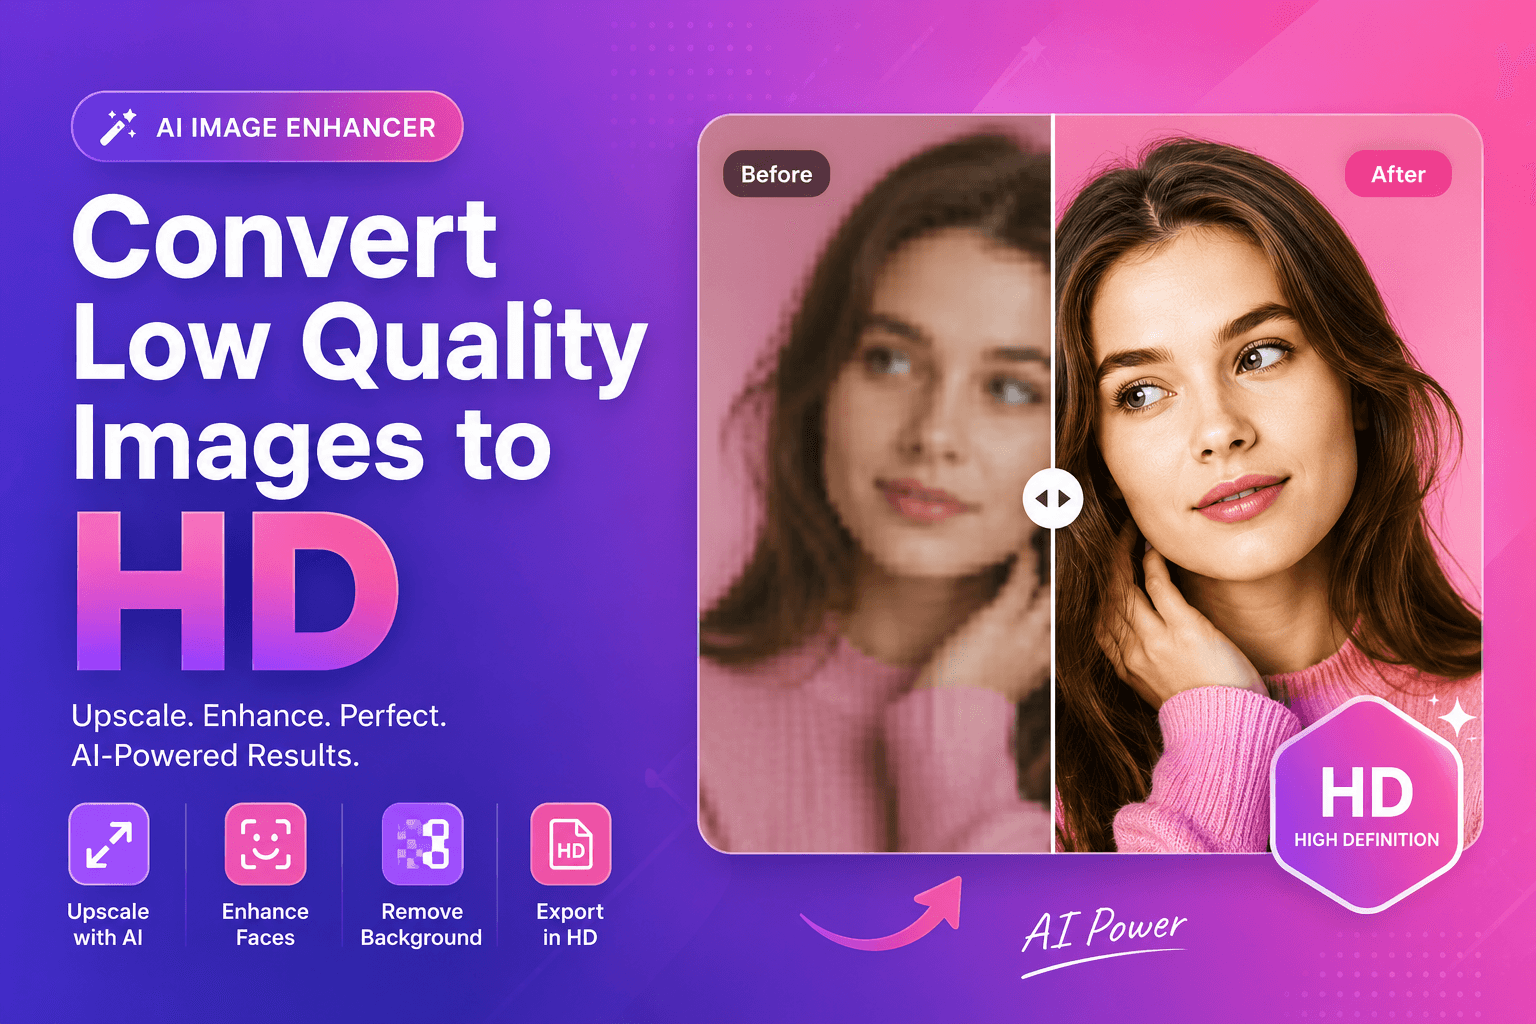
How to Convert Low Quality Images to HD
If you want to convert low quality images to HD, you’re usually trying to rescue an important file: a small product photo, an old portrait, a client asset, or an image downloaded from social media. The challenge is simple: “HD” implies more detail, but the original image may not contain it.
AI can help by upscaling and improving perceived clarity, but the best results come from a workflow that avoids common mistakes (like over-sharpening or double compression).
What “HD” really means for images (quick explanation)
“HD” is used loosely. For images, what people usually mean is:
- higher resolution (more pixels)
- cleaner edges
- less visible artifacts
- better clarity on modern screens
Featured snippet: fastest way to improve a low quality image
- Upscale the image with AI
- Enhance faces if it’s a portrait
- Remove background if you need a clean cutout
- Export once at high quality
Step-by-step: convert low quality images to HD with AI
1) Find the best possible source
Before you do anything:
- check if you can download the original (not a screenshot)
- ask for the source from the client
- look for higher-resolution versions in cloud drives
Your results are limited by the input.
2) Upscale first (this is the core step)
To convert low quality images to HD, you need more pixels. Traditional resizing won’t add detail; AI upscaling can.
Try our image upscaler and compare the result at 100% zoom.
3) Reduce the “low quality look” (artifacts and softness)
Low quality images often have:
- JPEG blocks
- ringing around edges
- smudged texture
The best fix is to avoid stacking too many edits. Upscale once, then review.
4) Enhance faces (if your image includes people)
Portraits are special. Global sharpening often makes skin look rough or unnatural.
For a cleaner, more realistic improvement, use our face enhancer after upscaling.
5) Remove background for a professional finish (optional)
Sometimes the best way to make a low-quality image look “HD” is to simplify the design:
- isolate the subject
- place it on a clean background
If you need that clean look, try our free AI background remover and export a transparent PNG.
6) Export in the right format (avoid losing quality again)
Export once at high quality. If you export repeatedly, quality drops.
For format guidance, MDN is the best quick reference:
MDN: Image file types and formats
Best workflows by use case
For e-commerce images
Goal: sharper product edges + clean background.
Workflow:
- Upscale product image
- Remove background
- Resize for your store template
- Compress lightly for fast loading
For old photos and memories
Goal: improve clarity without making it look fake.
Workflow:
- Upscale
- Review texture and faces
- Enhance faces subtly if needed
- Export cleanly
For social media downloads
Goal: recover the best possible quality from a compressed file.
Workflow:
- Upscale
- Avoid heavy edits (compression artifacts become obvious)
- If needed, remove background and rebuild the design
web.dev explains why compression hurts quality and performance:
web.dev: Image performance issues
Tips to keep results natural (avoid “AI plastic”)
AI can overdo it. Use these rules:
- Prefer subtle improvements
- Don’t stack many filters
- Zoom to 100% and inspect eyes, hairline, and text
- Keep skin texture visible
H3: The “three checks” after upscaling
- Edges (no halos)
- Texture (not waxy)
- Text (readable and not broken)
Troubleshooting: common low-quality problems (and fixes)
Low-quality images usually fail for predictable reasons. Here are fast fixes you can apply.
H3: Problem — heavy JPEG artifacts
Signs:
- blocky squares in gradients
- dirty edges around text and faces
Fix:
- avoid re-exporting the same JPEG repeatedly
- upscale once, then export at high quality
- if possible, start from a cleaner source
H3: Problem — tiny images from messaging apps
Messaging apps often shrink images aggressively.
Fix:
- find the original upload
- otherwise, use our image upscaler first, then rebuild the design (background removal helps)
H3: Problem — blurry edges after enlargement
Fix:
- upscale before resizing to your final dimensions
- keep edits subtle (don’t stack heavy filters)
Mini workflow for “HD product images” (e-commerce)
If your goal is a clean, modern product image that looks HD:
- Upscale to improve edge clarity
- Remove background for a clean subject
- Place on a consistent background (white or soft gradient)
- Resize to your store’s template size
- Export once at high quality
To start fast, try our free AI background remover and then run the result through the image upscaler if needed.
External sources (authority)
If you want trusted references on images and publishing:
FAQs
Can AI truly convert low quality images to HD?
AI can improve resolution and clarity, but it can’t perfectly recreate missing details. Results vary by input quality.
Should I upscale before removing background?
If the image is tiny or edges are messy, upscale first. If the subject is already clear, background removal first can be fine.
Why does my “HD” result look fake?
Over-sharpening and over-smoothing are common. Choose a more natural result and avoid stacking multiple enhancements.
What is the best format to export an HD image?
For photos, JPEG or WebP is common. PNG is best for transparency or text-heavy graphics.
How do I keep file size small after upscaling?
Resize to the actual display size and compress carefully. Avoid repeated exports.
CTA: Convert your image to HD with ImgifyTools
Ready to upgrade your image?
- Use our image upscaler to convert low quality images to HD
- Enhance portraits with our face enhancer for natural clarity
- Try our free AI background remover for clean cutouts and pro designs
Upload your image now and see results instantly.
Conclusion
To convert low quality images to HD, focus on a clean workflow: upscale once with AI, enhance faces carefully when needed, simplify the background for a professional finish, and export in a high-quality format. With the right steps, you can turn “almost usable” images into assets you’re proud to publish.
You may also like

How to Remove Image Backgrounds with AI (Fast, Clean Results)
Learn how AI background removal works, when to use it, and how to get pro cutouts for e‑commerce and social—plus tools to upscale and enhance portraits.
Read next →

Compress Image Without Losing Quality (Best Methods)
Compress images without losing quality using practical methods for web and e-commerce. Learn formats, settings, and a simple workflow for fast, sharp results.
Read next →

Increase Image Resolution Online (AI Guide)
Increase image resolution online with AI. Learn what resolution really means, how to upscale cleanly, and how to avoid blurry, fake-looking results.
Read next →