
Increase Image Resolution Online (AI Guide)
If you need to increase image resolution online, the first instinct is usually: “Can I just resize it bigger?” The problem is that resizing alone does not add real detail. It often makes images look soft, pixelated, or strangely “plastic.”
This guide shows you how AI upscaling works, when it’s worth using, and the simplest workflow to get sharper results for web, print, and e-commerce.
What “image resolution” actually means (simple explanation)
Resolution is usually discussed in two ways:
- Pixel dimensions (example: 1200 × 1200)
- Print density (DPI/PPI for printing)
For most online use cases, pixel dimensions matter most. If your image is small, it has fewer pixels. Fewer pixels means less information, especially around edges and fine textures.
Featured snippet: quick rule of thumb
- For web banners and thumbnails: focus on pixel dimensions
- For printing: check DPI/PPI and target file size
Why normal resizing makes images worse
Traditional resizing uses interpolation. It guesses intermediate pixels based on neighbors. That can smooth edges and blur details.
AI upscaling is different. It predicts what detail could look like based on learned patterns—often improving edges, textures, and readability.
If you want to try it immediately, use our image upscaler and compare before/after at full size.
Step-by-step: increase image resolution online with AI
1) Start with the best source you can find
Before you upscale:
- Use the original camera file if possible
- Avoid screenshots of screenshots
- Avoid multiple re-exports (each export can lose detail)
2) Upscale first when the image is too small
If the image is tiny and you also need background removal, the best order depends on the file:
- If edges are messy: upscale first, then remove background
- If the subject is clear: remove background first, then upscale
For product photos with noisy backgrounds, a good chain is:
- Try our free AI background remover for a clean cutout
- Upscale using our AI image upscaler for banners or zoom
3) Inspect texture and edges (don’t judge by thumbnails)
Zoom to 100%. Look for:
- Hair strands and fur edges
- Text readability
- Product edges (logos, labels)
4) Export for the right destination
Use:
- WebP/AVIF for modern web delivery when possible
- PNG for transparency and crisp UI-like images
- JPEG for photos where you need smaller size
If you want a clear breakdown of formats, MDN’s overview is excellent:
MDN: Image types and formats
When AI upscaling is worth it (and when it isn’t)
Worth it for
- Low-resolution product photos
- Old portraits and scanned prints
- Social media assets that must crop well
- Client work where sharpness impacts trust
Not ideal for
- Heavily compressed images with blocky artifacts
- Motion-blurred photos with no real edge detail
- Tiny text that’s already unreadable
In those cases, you may still improve the image, but manage expectations.
Tips to get more natural results (avoid “AI weirdness”)
AI upscaling can sometimes over-sharpen. Use these tips:
- Prefer moderate upscaling if you’re unsure
- Avoid stacking multiple AI enhancements at once
- Compare with the original at the same zoom level
H3: Fix faces without over-smoothing
For portraits, upscaling alone can help—but faces are sensitive. If your subject looks waxy, stop and try a dedicated enhancement step.
For headshots and creator photos, use our face enhancer after upscaling to keep skin texture believable while improving clarity.
Best workflows for common users
For e-commerce sellers
- Upscale product image for zoom
- Remove background to standardize catalog
- Export in consistent size and background style
For freelancers and designers
- Upscale client assets (logos/photos) for new layouts
- Use transparent PNGs after background removal
- Compress final images for fast-loading pages
Google’s guidance on images is aimed at search, but it’s also good UX advice:
Google Search Central: Images
FAQs
Can I increase image resolution online for free?
Yes. Many tools let you start without paying upfront. ImgifyTools is built for fast browser workflows.
Is AI upscaling the same as sharpening?
No. Sharpening boosts contrast at edges; AI upscaling predicts missing detail and can improve structure.
Should I upscale before or after removing background?
If edges are messy, upscale first. If the subject is already clean, remove background first and upscale after.
What file type should I upload?
Upload the highest-quality file you have. Avoid heavily compressed copies.
How do I keep file sizes small after upscaling?
Export to modern formats when possible and compress appropriately. web.dev has practical guidance:
web.dev: Image performance
CTA: Try ImgifyTools for free
If you’re ready to improve your images today:
- Try our image upscaler to increase resolution online and recover detail.
- Need a clean cutout? Try our free AI background remover for transparent PNGs.
- Working with portraits? Enhance faces with our AI face enhancer for a professional finish.
Conclusion
To increase image resolution online in a way that looks real, avoid simple resizing. Start with the best source, use AI upscaling, inspect results at 100%, and export for the correct platform. When you pair upscaling with the right supporting tools (background removal and face enhancement), your images look sharper, cleaner, and more trustworthy—exactly what modern audiences expect.
You may also like

How to Remove Image Backgrounds with AI (Fast, Clean Results)
Learn how AI background removal works, when to use it, and how to get pro cutouts for e‑commerce and social—plus tools to upscale and enhance portraits.
Read next →

Compress Image Without Losing Quality (Best Methods)
Compress images without losing quality using practical methods for web and e-commerce. Learn formats, settings, and a simple workflow for fast, sharp results.
Read next →
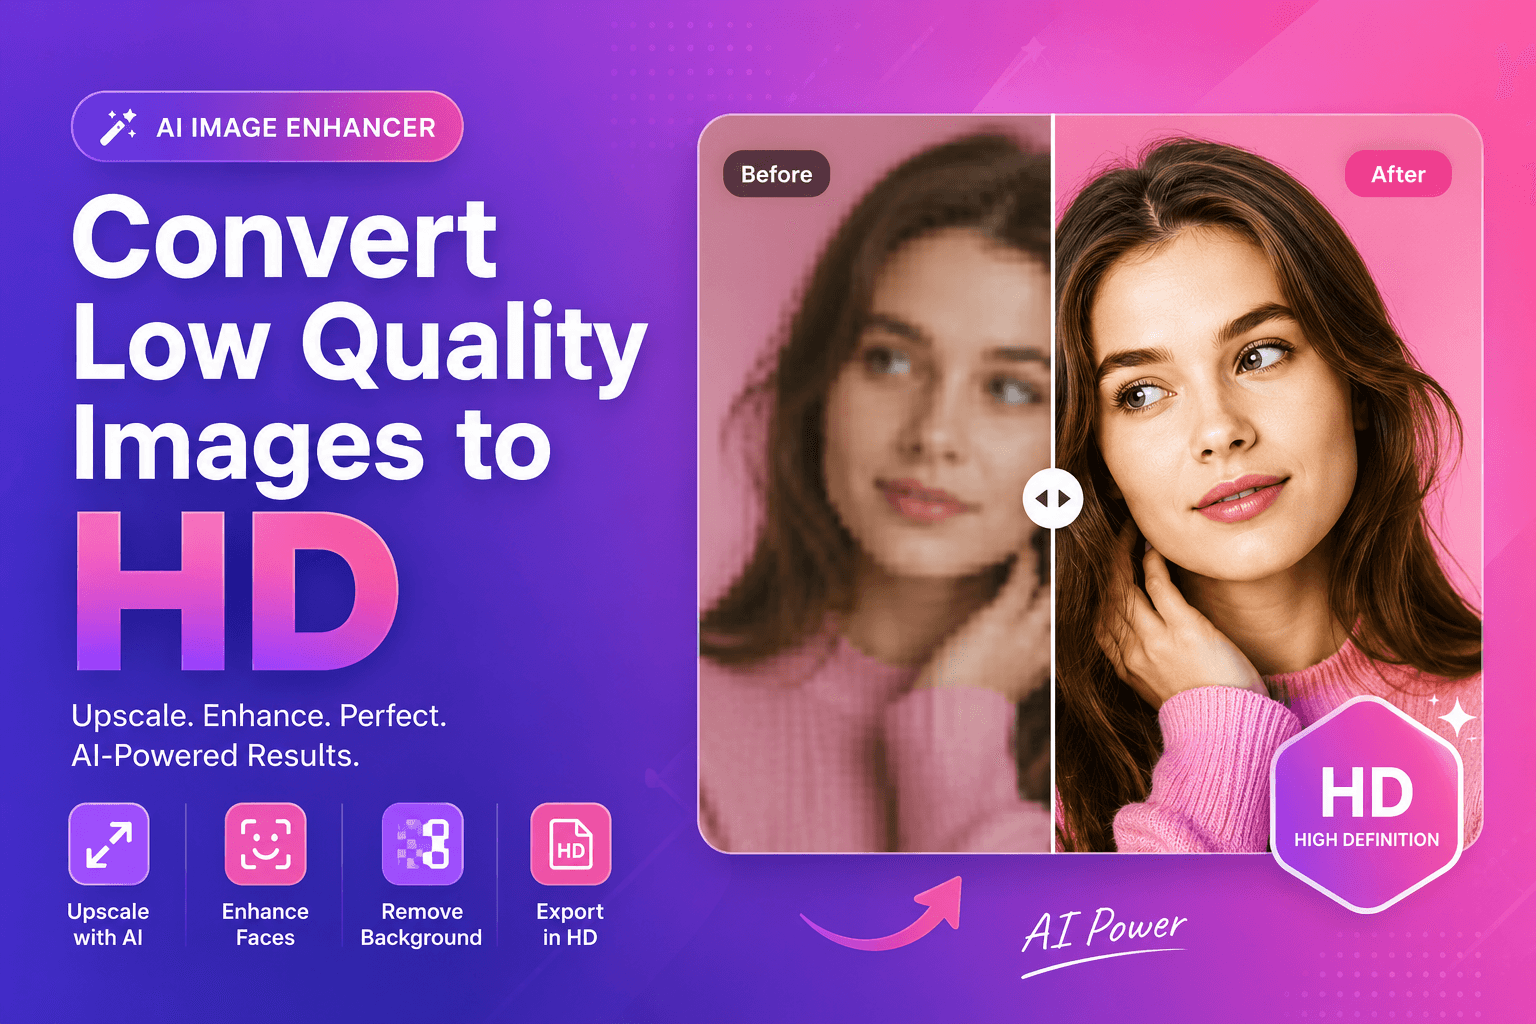
Convert Low Quality Images to HD (AI Method)
Convert low quality images to HD using AI. Learn a clean step-by-step workflow to upscale, reduce artifacts, and improve faces and cutouts for real use.
Read next →