Passport Size Photo Maker Online (Free Tool Guide)
Need a passport size photo maker online that’s fast, simple, and doesn’t require a studio visit? Many people only realize the requirements when the application deadline is close—then they rush, upload a selfie, and get rejected because of background, crop, or sizing.
This guide gives you a practical, beginner-friendly workflow to create passport-style photos that look clean and professional.
First: passport photo rules (what usually matters)
Rules vary by country and application type, but most agencies care about:
- Correct dimensions (width × height)
- Neutral background (often plain white or light)
- Face position (head size and placement)
- No heavy filters (natural look, accurate colors)
- Sharp focus (no blur)
Featured snippet: quick “passport photo checklist”
- Plain background
- Face centered, eyes visible
- Neutral expression
- Even lighting, no harsh shadows
- Correct size and crop
For exact sizes, always check the official site of your country’s passport/visa authority. You can also confirm sizing guidance on reputable government pages before submitting.
Common passport photo sizes (quick reference)
These vary by country, but here are common examples you’ll see online:
- 2 × 2 inches (often used for US-style passport photos)
- 35 × 45 mm (common in many countries and visa formats)
Do not guess. Use these as a reminder to verify the exact requirement for your application.
What counts as a “passport-style” photo (even for other IDs)
Even if you’re not applying for a passport, many platforms use the same style for:
- visas
- work permits
- national IDs
- student cards
- job applications and onboarding
The same rules apply: clean background, correct crop, and sharp facial detail. If you build a repeatable workflow once, you can reuse it for many documents.
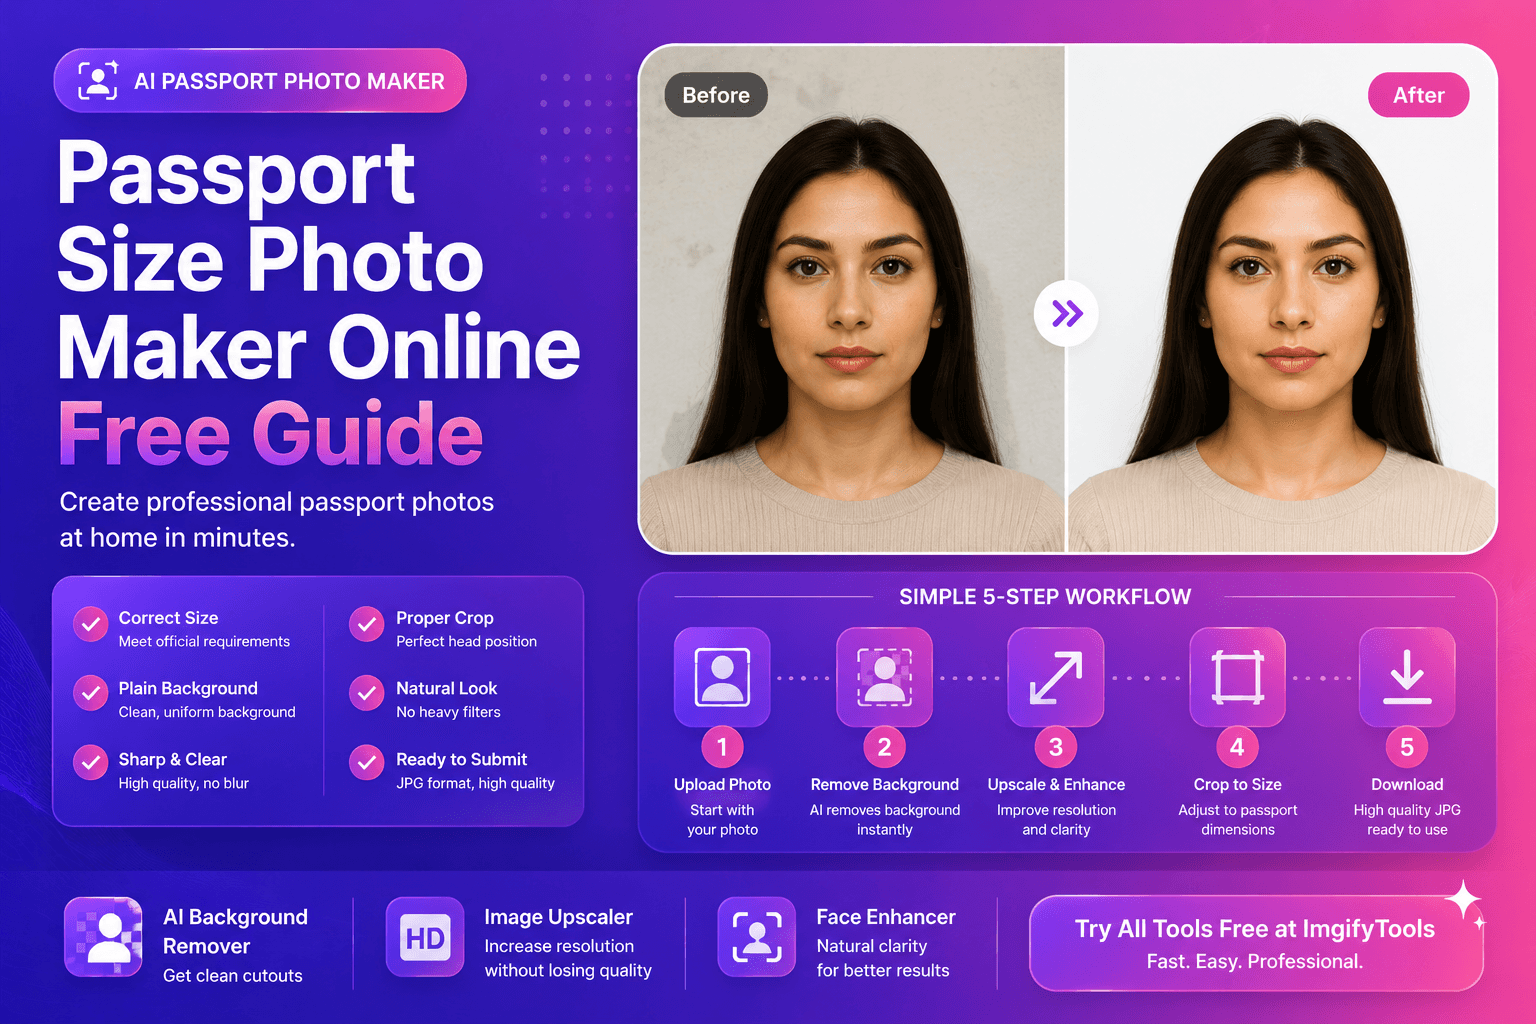
Step-by-step: make a passport size photo online
1) Capture the photo correctly (this makes everything easier)
You can get studio-level results with a phone if you do the basics:
- Stand near a window for soft, even light
- Use a plain wall as your background if possible
- Avoid strong shadows behind your head
- Keep the camera at eye level, not above or below
If your background is not plain, don’t panic. You can still fix it.
2) Remove or clean the background (fast and reliable)
Most rejections happen because the background isn’t acceptable. The simplest fix is to start with a clean cutout and place it on a compliant background.
To do that quickly, try our free AI background remover and export a clean cutout.
Then place your cutout on a solid white or light background in your editor workflow.
3) Improve clarity if the photo is low resolution
If your image looks soft or pixelated, it can fail quality checks. Before final export:
- Run our image upscaler to increase resolution and improve edge clarity
This is especially useful if the original was a cropped image or a low-quality file.
4) Enhance faces carefully (no beauty-filter look)
Passport photos should look natural. The goal is not “perfect skin.” It’s clean clarity and accurate tone.
For subtle improvement, use our face enhancer to sharpen facial detail while keeping a realistic look.
5) Crop to passport proportions
Cropping is where many people mess up. Agencies usually want:
- The head centered
- A specific head height range (not too big or too small)
- Eyes level and visible
If your crop is too tight, the face looks cramped. If it’s too wide, the face becomes too small.
6) Export and check before submission
Before you submit:
- View the image at 100%
- Make sure the background is uniform
- Confirm the dimensions match the requirement
- Save a version without heavy compression
For help choosing formats (JPEG vs PNG vs WebP), use MDN’s guide:
MDN: Image formats
Troubleshooting: why applications reject passport photos
If your photo gets rejected, it’s usually one of these reasons:
- Background isn’t uniform (texture, shadows, gradients)
- Face is not centered or the crop is too tight/too wide
- Image is blurry or too low resolution
- Over-edited look (filters, heavy smoothing, altered tones)
- Incorrect dimensions (even small mismatches can fail checks)
H3: quick fix workflow after rejection
- Confirm exact size requirements
- Remove background and place on a clean, compliant color
- Upscale if the file is too small
- Re-crop with extra breathing room
- Export once at high quality
Pro tips for a more “official” look
These small details improve acceptance rates:
- Wear clothing that contrasts slightly with the background
- Avoid shiny makeup or strong highlights
- Remove tinted glasses; avoid glare
- Keep hair away from eyes if possible
H3: Lighting fix if you only have indoor lamps
If window light isn’t available:
- Use two lights (left and right) if possible
- Stand a little away from the wall to reduce shadows
- Avoid overhead lights that cast eye shadows
Featured snippet: best workflow in one line
Remove background → place on compliant background → upscale if needed → crop to size → export
That workflow is fast, repeatable, and works for most applicants.
External sources (authority)
When you’re unsure, trust official documentation and reputable references:
FAQs
Can I make a passport size photo online with a selfie?
Yes, if the selfie is taken with proper lighting, neutral expression, and the right crop. Background and clarity matter most.
What background color is required?
It depends on the country/application. Many require plain white or light backgrounds. Always verify.
What file format should I submit?
Most applications accept JPEG. Use a high-quality export and avoid over-compression.
My photo looks blurry after cropping—what should I do?
Upscale before final export. Try our image upscaler to recover clarity.
Can I lightly enhance my face for a passport photo?
Yes, but keep it natural. Use our face enhancer for subtle clarity, not heavy smoothing.
CTA: Make your passport photo in minutes
If you want a quick, professional workflow:
- Try our free AI background remover to get a clean cutout.
- Use our image upscaler if your photo is low resolution.
- Enhance faces with our face enhancer for natural clarity.
Upload your image and get a passport-ready result faster.
Conclusion
A passport size photo maker online is only helpful if the output meets real requirements: clean background, correct size, and sharp clarity. Follow the workflow in this guide, verify your exact dimensions, and keep edits natural. With the right steps, you can create a professional passport photo at home—without wasting time or risking rejection.
You may also like

How to Remove Image Backgrounds with AI (Fast, Clean Results)
Learn how AI background removal works, when to use it, and how to get pro cutouts for e‑commerce and social—plus tools to upscale and enhance portraits.
Read next →

Compress Image Without Losing Quality (Best Methods)
Compress images without losing quality using practical methods for web and e-commerce. Learn formats, settings, and a simple workflow for fast, sharp results.
Read next →
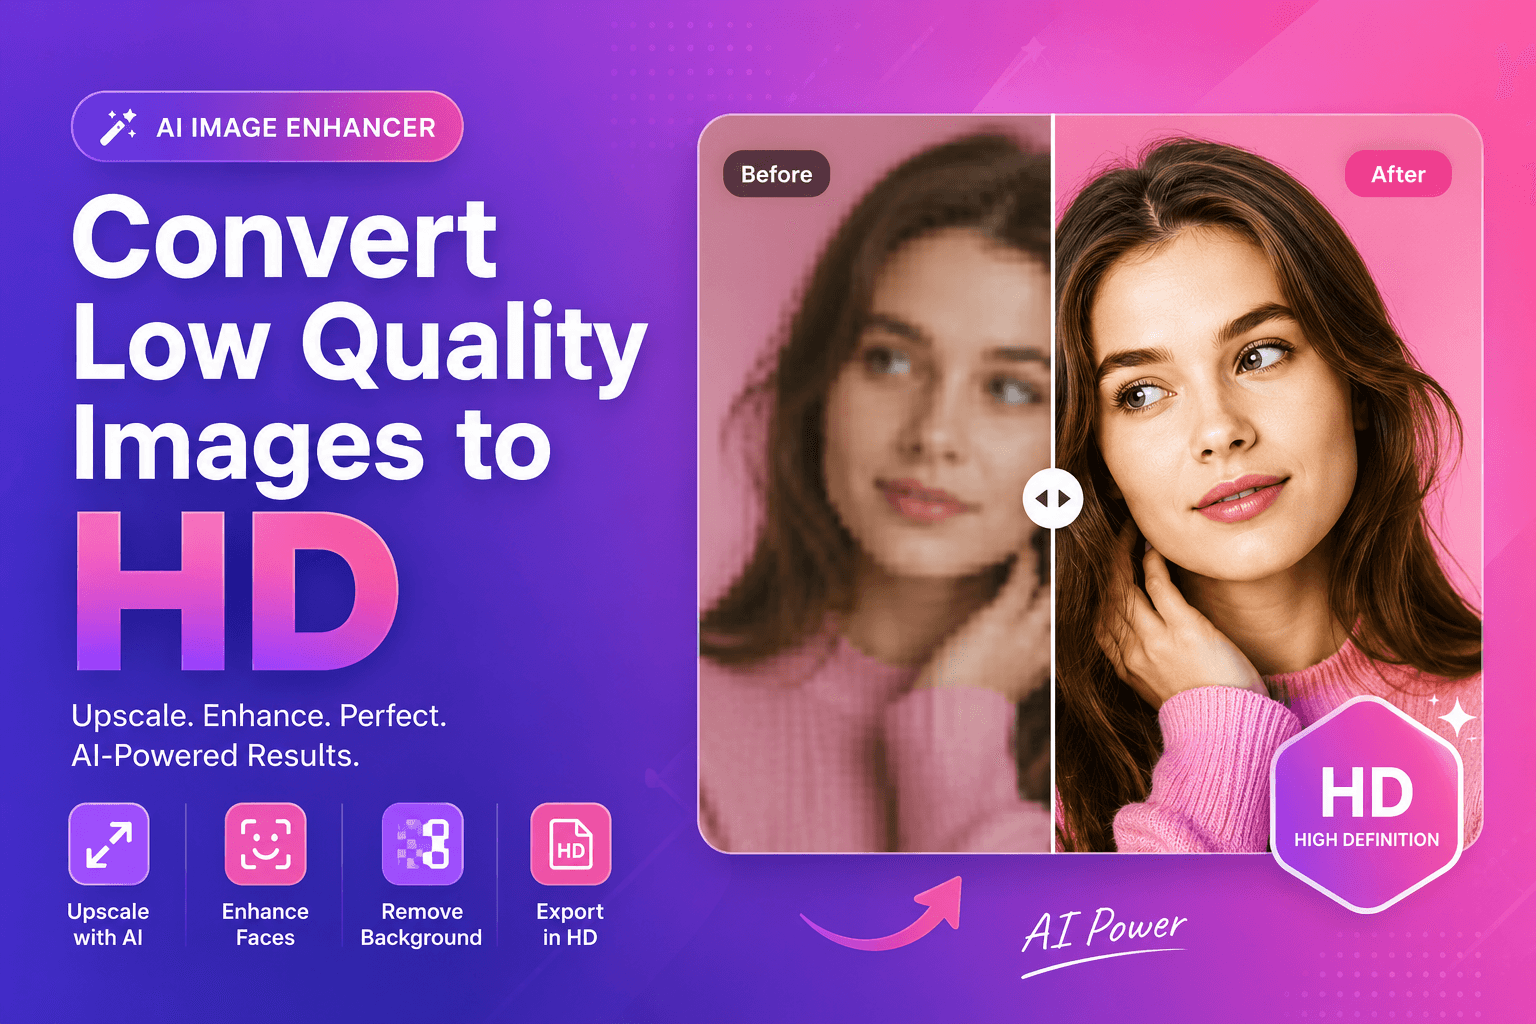
Convert Low Quality Images to HD (AI Method)
Convert low quality images to HD using AI. Learn a clean step-by-step workflow to upscale, reduce artifacts, and improve faces and cutouts for real use.
Read next →